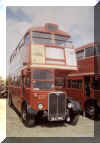
 and here is RT4325 at the Weymouth Rally following which. in February 1976, she was put in a
barn on a farm in High Wycombe in order that renovation work could be carried out. At this point another person, Jeff Guy, became involved in the project.
London Transport RT - RT4325 History
by Derek Funnell
Back in the early 1970’s, a friend of mine, Robin Thomas, told me that he was considering purchasing a London bus, and wondered if I’d like to go in with him. As I’d been interested in commercial vehicles since primary school days, I said yes.
He’d looked into the legalities of owning such a vehicle, and in those days it could be registered as a ‘private heavy motor car’ and driven on a car
licence. He’d also arranged garaging for it. Insurance was a bit steep, and we could only carry a maximum of six persons.
He had seen RT4325 when it was still in use with London Transport (circa 1973), and had written to them to state his interest and ask when it was likely to be withdrawn from service. I don’t recall the response, but it was sold to the London Bus Preservation Group in November 1973, and he purchased it from them in October
1974 (RT4325 was the last RT in service that had a roofbox to display the
route number).
We took it to a couple of rallies in 1975;
 and here is RT4325 at the Weymouth Rally following which. in February 1976, she was put in a
barn on a farm in High Wycombe in order that renovation work could be carried out. At this point another person, Jeff Guy, became involved in the project.


 These three images show RT4325 in service, and were passed onto us by a bus enthusiast,
following an article in the Hayes Gazette after Robin had bought the bus.
Another photograph of RT4325 in service can also be found on the Internet at
Golders Green Station - circa 1968).
(UPDATE: The three photos above were taken by Basil Hancock, another enthusiastic contributor to this site, who has kindly supplied higher-quality scans of two of the original images, these are displayed below):
 And here is RT4325 pictured by Alan Bond at Hillingdon in 1975.
(Derek Funnell has commented that he believes this was pictured at a Showbus
rally sadly no longer held at the Hillingdon show ground.)
 Derek adds that Alan Bond has also
mentioned the RT 50 rally at Covent Garden in 1989 when the RT4325 chassis was parked next to St. Helens RT No.
D67 (see below here).
Twenty-five years later, by happenstance, at the RT 75 rally at Brooklands, the RT4325
chassis was again parked next to D67!
The
restoration Project begins:
We started by removing the lower body panels to make access to the chassis easier. As the panels came off, corrosion and wood rot were exposed, and therefore more panelling was removed. This was the thin end of the wedge, and we went on to dismantle both the body and chassis entirely.
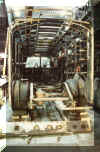

 The
platform riser was removed in January 1978 as it was considered beyond repair, so a replacement was made with the aid of the LT drawings
(RT.006.E1). Also the wheel arches and much of the rear partition.
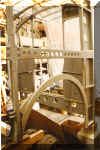
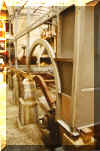
 These three photo’s show the body as it existed in 1980. All components here have been removed, refurbished and re-assembled.

 Hot Riveting on the Frame 05 Apr 1981
& the frame assembly. This shows how far the chassis was dismantled. The flitch plates are being riveted back onto the side rails.
 The chassis has since been re-built, and was put on display at Covent Garden in
on August 6th 1989 for the ‘RT50’ rally (and at Newark in May 2012 for the AEC centenary
rally).
Twenty-five years later, by happenstance, at the RT 75 rally at Brooklands, the RT4325
chassis was again parked next to D67! (see
above here).
Work on the body suffered delays from other vehicular distractions, and for a while, existed as a lower deck skeleton, from the platform riser forward, but excluding the front bulkhead.


 The front bulkhead required much repair work to the lower panelling due to fatigue cracks and corrosion. LT fitted reinforcement panels at major overhaul. (See drawing
RT.440.E1).

 Here is an inter-roof panel for RT4325 shown after de-rusting. In the second image a PRV
inspection stamp can be seen showing PRV 15 (Did "15" denote a
particular inspector? Does anyone know? Ed.).
Derek
Funnell's update - January 2016
Derek writes: "Here’s a rather overdue update on RT4325’s restoration
progress. The main milestone passed, is the rebuilding and fitting of the
front bulkhead. Work on the bulkhead began in August 2010 and was completed in
November 2014. With that installed, it was then on to the floor framework,
and those in number 1 & 2 bays have now been fitted."
Derek
Funnell's update - July 2017
Derek writes: Fitting of the lower deck floor framework was completed in June 2016. New footstool floor panels were made
up and fitted in No. 3 bay in July 2016. These had to be made in two pieces and butt welded, due to the semi-circular pressing not running the entire length of the
panels; to have made them as one piece panels would have required some serious press tooling!
We were very happy with the finished result.
The next task was to make up and fit new cant plate sections along the edge of the inter roof. The original ones were beyond repair, so we had eight
foot long sections (longest we could get) made up by a local sheet metal fabricator.
Between August & September 2016 the sections were cut, drilled, and welded, to make the four cant plate assemblies (as per LT drawings
RT.002.G9, RT.046.G1, &
RT.055/6.G1).
The new cant plates could have been fitted at this stage, but it was preferable to fit them with the foot
brackets as they are bolted through the cant plates and effectively secure them to the inter roof sticks.
As it was a wet assembly (jointing compound) we wanted all fixing points to be fully secured on installation.
Like the cant plates, the original foot brackets were also beyond saving, so a complete new set was made up.
Including the various items of tooling required (formers, press tools, drill jigs), manufacture of the brackets took about three months (Jan – Mar 2017).
With the foot brackets completed, installation of the cant plates was carried out during April and May 2017.
The next item on the agenda is the front frame assembly; and that will figure in
the next progress update.
Derek
Funnell's update - April 2018
Derek writes:
The front frame assembly:
During its working life the near side front edge of the frame had sustained some damage, resulting in buckling of the top panel and the curved channel section, and splitting of the wooden front moulding rail. The N/S front corner pillar had also split slightly.
LT had carried out repairs to the moulding rail and added brackets to the channel section to enable the timber moulding to be refitted to the still deformed steel work.
Restoration work on the front frame assembly commenced on 30th April 2017. It was dismantled entirely and the components de-rusted by shot blasting. The damage to the top panel and curved channel section was made good. The side channel sections were too badly rusted, so new ones were made up, along with the end brackets which fix it to the side pillars above the bulkhead.
As the front frame is cantilevered from the main body frame, it was necessary to fit the upper deck side pillars in order to provide support for it. The first three pairs of side pillars were refurbished and fitted to the new foot brackets. With these in place, together with the various horizontal rails and diagonal tie bars, it was then possible to fit the front frame assembly.
The basic frame assembly was refitted on 11th March 2018, and the various timber components (corner pillars, moulding, seat and window rails) were refurbished and fitted over the following five weeks.
It may be noted that the off side front corner pillar has a halving joint in it, between the window rail and seat rail. I presume that this was a repair that LT carried out, and rather than replace the whole pillar, necessitating the removal of window pans and many more components, they opted for the jointing solution.
Next on my ‘to do’ list are the longitudinal seat frames and rear wheel arches. A fair bit of work required on them!
|
Front Frame Fitting |
|||

|
Fitting front frame assembly 11/Mar/2018 |

|
Front frame assembly fitted 11/Mar/2018 |

|
Front frame timbers fitted 15/April/2018 |

|
Front frame timbers fitted 15/Apr/2018 |
Derek
Funnell's update - October 2019
Derek writes:
Dismantling of the longitudinal seat frames and footstools began in May 2018.
The seat riser panels were severely corroded along the lower edge, and had been repaired during the vehicle’s service life by riveting patch panels over them.
These repair sections were removed and the seat risers shot blasted. The corroded portions were cut away and new sections were made up. Temporary flanges were formed along the cut edges of the seat risers in order to locate the new sections in position by spot welding. The sections were then
MIG
welded (by a professional welder), after which the flanges were cut away and the welds ground smooth.
The angle sections around the upper edge of the footstools were also badly corroded and needed to be replaced. A local fabricator folded some sheet steel to produce straight lengths of angle.
These were then shaped to the footstool profiles using a sheet metal shrinking/stretching tool.
The seat frame and footstool components were then riveted back together and the assemblies then refitted to the body. With these in place, the rear wheel arches were then refitted, after having been shot blasted and had some fatigue cracks welded up.
The plywood tread panels on the footstools were replaced with newly made ones.
Work on the seat frames and wheel arches was completed in September 2019.
Between July and August 2019 the front blind box frame, sill rail, and roof front end ventilator structure were all stripped down and rebuilt. The blind box frame and sill rail have been refitted to the body structure. The ventilator structure will be refitted later.
We are now making preparations to reunite the body with the chassis, and it is anticipated that this will be carried out within the next month or two, if all goes to plan!
Derek
Funnell's update - February 2020
Derek writes:
Body and Chassis Reunion
When we originally separated the body and chassis, way back in 1980, the chassis was jacked up and levelled, and a support frame built under the body. The fuel tank and air reservoir etc. had previously been removed to allow this. The body mounting bolts were then removed and the chassis jacked down, leaving the body on the support frame. The rear axle was then removed and the chassis dragged out forwards with the rear end supported on a trolley.
Replacement of the chassis was a reversal of this procedure, but as the chassis was now fully restored we weren’t too keen to remove the axle and other items in order to avoid the support frame columns. Therefore another means of supporting the body was constructed.
It was, however, still necessary to remove the fuel tank and rear exhaust pipe.
Two beams were placed through the lower deck in Nos. 1 & 3 bays, just above the seat rail. These were connected to the floor frame by lengths of studding. The studding nuts were tightened so that the weight of the body was taken off the original support frame. The support frame was then removed, but leaving the two columns under the platform riser in place.
With the chassis positioned in front of the body, the rear wheels were removed and replaced with tyre-less wheels, in order to lower the chassis sufficiently to pass under the bulkhead. A wooden “track” was laid down for the wheels to run on. A plum bob was hung from the rear cross member in order to align the chassis with a centre line marked on the floor.
The chassis was then rolled back carefully on the hand brake until it was in the correct position under the body. The barn floor being on a slight incline aided this manoeuvre.
The chassis was then jacked up to the body and supported on wooden blocks. The body support beams were then removed, along with the two remaining columns under the platform
riser.
Comment from the
Editor:
The next stage in this restoration process is still undecided but Derek believes
it will probably be the upper deck rear end side frame structure (see drawings RT.038.C1
sh 1, RT.038.C1
sh 2, & RT.039.C1).
Derek
commented that there is quite a bit of work required on that structure.
Derek
Funnell's update - January 2021
Derek writes:
The Covid crisis has slowed the restoration progress as I’m currently unable to visit the barn, but I am able to work on some of the components which I have at home.
And, as per the end of my last update, I’m currently working on the upper deck No. 5 & 6 bay side frames. The offside bays are now
complete. I’ve attached a couple of images, unfortunately of less
quality than usual.
|
Nearside Bay Assembly & Offside Bay Framework |
|||

|
Nearside No.6 Bay Assembly |

|
Offside Nos. 5 & 6 Bay Framework fitted |
Derek
Funnell's update - August 2021
Derek writes:
Upper deck rear end side frame
structure:
The dismantling of the offside upper deck side frame assembly (bays 5 & 6) was carried out in March 2020.
As the stress panels were rather rusty, and the rivet holes were somewhat oversize, I decided it would be best to make new ones.
Also, the channel section in bay 6 was badly corroded so this too was replaced with a newly made one.
The rest of the framework was shot blasted and painted. Assembly of the two bays was carried out during late July
2020 and then the entire assembly fitted to the body shell in mid August.
The roof side rails were refurbished in September and the offside one fitted in late
October 2020.
The dismantling of the nearside upper deck side frame assembly (bays 5 & 6) was carried out in
October 2020.
Again the stress panel (bay 5) and channel section (bay 6) were replaced due to their condition.
The blind box assembly (bay 6) was shot blasted and painted, as were the remaining components.
Due to the Covid lockdown period and travel restrictions (Dec 2020 – Mar
2021), I carried out renovation work at home on various cab framework components.
Reassembly of the nearside upper deck side frame was completed in May 2021 and it was fitted to the body shell in early June, along with the nearside roof side rail.
I have now moved on to replacing the floor boards on the upper deck.
Derek
Funnell's update - November 2021
Derek writes:
Upper deck floor boards:
As the original floor boards were in a rather rough condition (after their original removal), it was decided that they would be replaced with new ones.
A sample board was sent to timber merchant W. Hanson in Southall (located under the iron bridge right next to the former AEC
site) who machined up a quantity of tongue and groove boards to match.
The new boards were delivered to site on Friday 6th August, and work to fit them began on the following Sunday. The work was completed on 7th
November and with a decent floor then in place I was able to fit the front roof stick and the roof route box.
The next job on the list is the upper deck rear frame; a fair bit of work is required on that!
I’m also looking to re-assemble the cab framework, as a number of the components have already been renovated.
|
Upper Deck Floor Boards |
|||

|
Upper deck floor boards 22/Aug/2021 |

|
Fitting upper deck floor boards 05/Sep/2021 |

|
Floor boards fitted & trial fitting of roof box 07/Nov/2021 |
||
Derek
Funnell's update - October 2023
Derek writes:
Cab:-
The individual cab components were taken home and renovated over a period of time from early 2021.
We were fortunate to have obtained new rubber floor sealing strips some time ago, as the original ones were in poor condition.
Work on the cab interior was completed in August 2023.
Lower deck flooring:-
As with the upper deck flooring, the lower deck boards were supplied by W. Hanson of Southall.
Work commenced on fitting the boards in November 2022 and was completed in February 2023. The access hatches have not at this stage been refurbished, apart from the flywheel cover.
Upper deck coving panels:-
All of the coving panels were in poor condition, having had repair panels fitted to their lower edges. It was therefore decided to make new ones. Fitting of them was completed on 8th October 2023.
Rear frame:-
Work commenced on the upper deck rear frame in August 2022. It was dismantled completely, re-built, and re-fitted to the body by July 2023.
Work has now commenced on the lower deck rear framework.
| RT4325 in the LT Aldenham Works Float System | |
| The following chart shows, in practice, the result of the Works Float System employed at London Transport's Chiswick and Aldenham works where chassis & bodies were exchanged on a regular basis. For a more comprehensive understanding of this process see London Transport Aldenham Works. Ed. | |
| RT4325 (Reg. No. NLE 989) History | |
|
AEC Chassis No. 09617290 |
Park Royal Body No. 2103 History |
|
AEC Chassis No. 09617290 (LT CU5229) (see Note-1) |
Fitted to AEC chassis No. 09611055 (LT CU1890) |
|
Reg. No. NLE 989 [Log Book references chassis 09617290] |
Reg. No. JXN 202 |
|
Initial body No. 8374 |
Body No. 2103 |
|
First registered 15/06/53 |
First registered 08/04/48 |
|
Type: 3RT8/2 (although at some time it was re-designated 3RT10, possibly when body No 2103 was fitted). |
Type: RT3(c) RT824 (Built in a batch designated RT752 to RT851). |
|
First in service 15/07/53 at Victoria, although between those dates it is listed as being at Park Royal and Aldenham. |
First in service 22/09/48 at Mortlake, although between those two dates it is listed as being at Aldenham, Park Royal and Chiswick. |
|
This AEC chassis 09617290 (LT CU5229) was given a Saunders bodied RT 250 and was scrapped in 1970! |
Body removed from RT824 23/02/56. Transferred to RT925, JXN303. |
|
Removed from RT925 28/09/59. Transferred to RT2774 LYR758. |
|
|
RT824 scrapped at Wombwell Diesels 22/05/73 with Body No. 5833. |
|
|
Re-bodied 28/01/64 with Park Royal body No 2103. |
Removed from RT2774 28/01/64. Transferred to RT4325. |
|
Converted to Decimalisation Trainer 10/09/70 at Leyton. |
|
| In storage from 01/04/71 to 15/10/71. | |
| Used for driver training between 16/11/71 and 09/11/73. | |
| Sold to London Bus Preservation Group, Cobham 12/11/73. | |
| Purchased by Robin Thomas 20/10/74. | |
| I am grateful to Brian Watkinson for the details below on the pre-history of this chassis & body combination | |
|
AEC Chassis No. 09611055 - RT4325 PRE-history |
Park Royal Body No. 2103 Type RT3 PRE-history |
|
The AEC chassis number is actually irrelevant; LT gave this chassis the designation CU1890 (Chassis Unit) in 1948. |
New as RT 824: 22/9/48 to M 26/7/50 J 12/9/52 to Aldenham (WK) for overhaul |
|
New as RT 1053 19/12/48 to GY 12/12/48; 26/1/53 WK for overhaul. (Chassis overhauled at Chiswick) |
O/H Still RT 824 24/9/52 to J 16/7/53 HW 9/55 |
|
O/H Still RT 1053 26/2/53 to GY 28/8/56 WK for overhaul |
Body type reclassified as RT 10 (see Note-2) 23/2/56 WK for overhaul. |
|
Now RT 1141 18/12/60 to RD 20/1/64 WK for overhaul |
O/H Now RT 925 21/3/56 to HW 24/9/59 WK for overhaul. |
|
O/H now RT 4325 to AP 19/2/64 with body No. 2103 (See body details right). |
O/H Now RT 2774 21/10/59 to HD 17/1/64 WK for overhaul. |
|
O/H now RT 4325 to AP 19/2/64 23/5/67 WK re-paint 3/1/5/67 AE 24/7/70. |
|
|
Delicensed (u) at AE 10/9/70 T Decimal trainer 1/4/71 Tu 19/10/71 CTu 16/11/71 H Trainer (t) 12/8/72 Dt 9/11/73 Du Sold 22/11/73 |
|
|
Note-1: For any vehicle undergoing overhaul at Aldenham (and Chiswick too) its body & chassis were often (usually) interchanged with bodies & chassis of other similar vehicles; that resulted in Registration Plates (and thus Log Books) being applied to a body/chassis combination that was not the original. The Log Book & Tax Disc being Department of Transport official documents cannot ever be altered, thus a Tax Disc referencing a particular Registration Plate would always reference the original Chassis for that vehicle. In order that a bus could leave Aldenham the same day as one with the same LT designation number & Registration Plate came in for overhaul (and the Tax Disc swapped over), it was necessary that the actual chassis could be changed. Although LT had governmental dispensation to transfer registration numbers between vehicles, as the Log Books could not be altered, LT gave each chassis a unique Chassis Unit (CU) number in order to know which was which (for more information see the Aldenham page). In the case of RT4325 (NLE 989), it finally left Aldenham with body 2103 & Chassis CU1890 (that was AEC Chassis No. 09611055). However, on the brass plate on the dumb iron it had RT4325 & AEC Chassis No. 09617290, that tied up with the Log Book for NLE 989 (and the stock number RT4325) but was not the actual chassis in use. The original chassis 09617290 for NLE 989, that was given LT CU5229 designation, ended up on a Saunders bodied RT 250 and was scrapped in 1970! |
|
|
Note-2: 150 bodies that were delivered in 1948 and fitted to RTs 752-851 and 962-1011 incorporated a number of modifications. These included the fitment of body mountings that would enable the body to fit the Leyland RTL chassis. The cab front, the front N/S and front bulkhead were modified to the same design as that of the Saunders RT3/3 body with a route plate holder fitted under the canopy, semaphore signal castings fitted on the N/S front bulkhead pillar, and on the O/S below the cab entrance, the rear registration plate box was also redesigned to incorporate a direction arrow. The front N/S canopy valence panel was cut away to allow the route plate to be seen (in the same style as all later RT bodies that had the canopy blind box fitted). The cab front lower rail (below the headlight) was altered to sweep up over the larger O/S chassis dumb irons of the RTL chassis ( the RT10 body's cab lower front rail was NOT the same as the Saunders; as with the RT3 the Saunders bodies were NOT intended to be fitted to RTL chassis and had no need of the cab front bottom rail sweeping above the dumb irons). This design was applied to all later RT bodies. Although originally classified as RT3 bodies these bodies were reclassified as RT10 in September 1955. |
|
I am grateful to Derek Funnell for supplying the set of over eighty documents of drawings, plans, lists etc. detailing the London Transport RT body structure that was used in the reconstruction of RT4325. These documents can be downloaded from the LT RT Downloads page. Ed.